Triathlon Transition Tips: T1 and T2 Explained
Transitions are often called the fourth discipline of triathlon, and for good reason. The time you spend in transition counts towards your overall finish time, and a smooth, efficient changeover can save minutes that might have taken hours of training to gain elsewhere.
Understanding T1 and T2
T1 is your swim-to-bike transition. You’ll exit the water, remove your wetsuit, and prepare to head out on the bike course. T2 is your bike-to-run transition, where you rack your bike, change footwear, and begin the run.
Both transitions require different skills and equipment, but they share a common principle: every second counts, and organisation is everything.
Setting Up Your Transition Area
When you arrive at the race, you’ll be assigned a spot to rack your bike. This small patch of ground becomes your base of operations, so treat it like valuable real estate.
Lay out a brightly coloured towel to mark your spot and provide a clean surface for your feet. Place your helmet on your bike’s handlebars with the straps undone and your sunglasses inside—this ensures you won’t forget them. Position your cycling shoes beside your bike, ready to step into.
For T2, arrange your running shoes beside the bike rack with the tongues pulled back and elastic laces already tightened. If you’re using a race belt for your number, have it laid out with your nutrition already attached.
Create a mental image of your setup. When you return from the swim or bike in an exhausted, adrenaline-fuelled state, your brain should be able to work on autopilot.
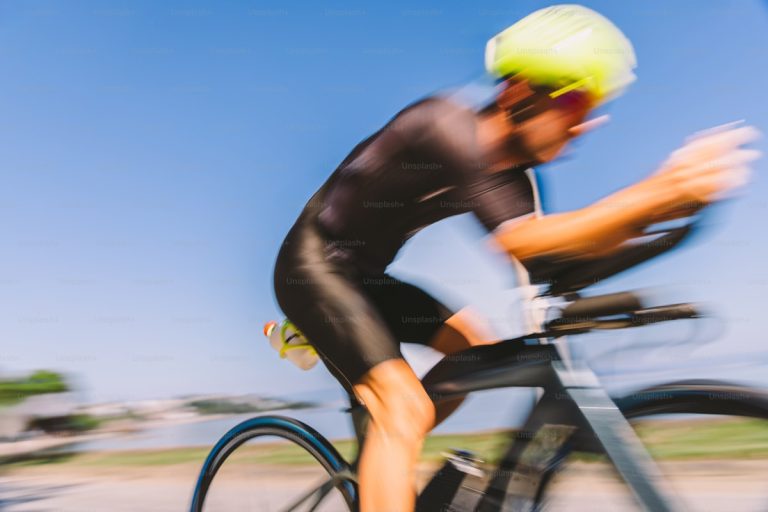
Mastering T1: Swim to Bike
As you exit the water, begin unzipping your wetsuit and pulling your arms out whilst you run towards transition. By the time you reach your bike, the wetsuit should be down to your waist.
Here’s where many beginners lose time: struggling with a wetsuit that’s stuck to wet skin. The trick is to practice the wetsuit removal motion until it becomes fluid. Pull from the ankles, not the calves, and if your wetsuit has leg cuffs, fold them inside out as you remove them.
Don’t waste time drying your feet perfectly—a quick wipe on your towel is sufficient. Put your helmet on first, fasten the strap, then put on your sunglasses. This order matters: in most races, you’re not allowed to touch your bike until your helmet is securely fastened.
Slip your feet into your cycling shoes, grab your bike, and run to the mount line. Some advanced athletes leave their shoes clipped into their pedals and mount the bike barefoot, but master the basics before attempting this.
Mastering T2: Bike to Run
As you approach transition on your bike, slip your feet out of your cycling shoes but keep pedalling on top of them. This lets you dismount quickly and run to your rack without hobbling in cleated shoes.
Rack your bike, remove your helmet, and slip on your running shoes. With elastic laces, this takes seconds. Put on your race belt with your number facing forward, grab your nutrition if needed, and go.
Your legs will feel strange for the first few minutes of the run—this is normal. Don’t panic. The sensation will pass as your muscles adapt to the new movement pattern.
Common Transition Mistakes
The biggest mistake is bringing too much stuff. Your transition area is small, and excess gear creates chaos. Bring only what you need for the race.
Another common error is forgetting to practice transitions in training. You wouldn’t show up to a race without training your swim, bike, and run—don’t neglect your transitions either.
Fumbling with helmet straps, forgetting sunglasses, putting shoes on the wrong feet—these mistakes happen when you rush without a system. Slow down, follow your routine, and speed comes with practice.
Time-Saving Equipment
Elastic laces transform your running shoes into slip-ons, saving 20 to 30 seconds you’d otherwise spend tying knots with tired, shaking hands. They’re inexpensive and worth every penny.
A race belt lets you attach your race number without safety pins and makes it easy to position the number on your back for the bike and your front for the run.
Consider talcum powder or anti-chafe lubricant inside your cycling shoes if you’re racing without socks. This reduces friction and helps your feet slide in smoothly.
Your Pre-Race Transition Checklist
Walk through your transitions the morning of the race. Locate your bike rack position, identify the entry and exit points, and visualise your route.
- Helmet on bike handlebars, straps undone, sunglasses inside
- Cycling shoes beside bike, ready to step into
- Running shoes beside rack with elastic laces pre-tightened
- Race belt laid out with nutrition attached
- Towel marking your spot with everything arranged in order of use
- Bike in correct gear for starting the ride
Efficient transitions won’t win you the race, but messy transitions can certainly lose it. Practice until your routine becomes automatic, keep your setup simple and organised, and remember that every second you save in transition is a second you didn’t have to earn through suffering on the course.